
Summary
-
What you'll do: Build a client's first financial plan in five steps: "Basic Info", "Investment Accounts", "Income Sources", "Contributions" and "Planned Spending".
-
How long it takes: A few minutes. The counter at the top of each step shows roughly how long is left.
-
Before you start: If the client has a completed FactFind, Timeline fills in many of the fields from it, so you mostly check and add. Each step is saved as you go.
Description
1. Start the plan
-
Open the client in Timeline. Under "Actions", click "Create financial plan". Once a client has a plan, the same row reads "Financial plan" and opens it.
2. Basic Info
-
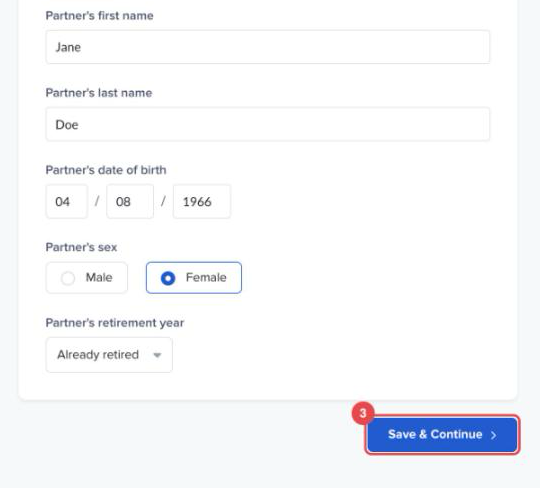
Check the client's details: name, date of birth, sex, retirement year and, optionally, email, postcode and health status. Under "Does the client have a partner?", choose "Yes" to add the partner's details and retirement year.
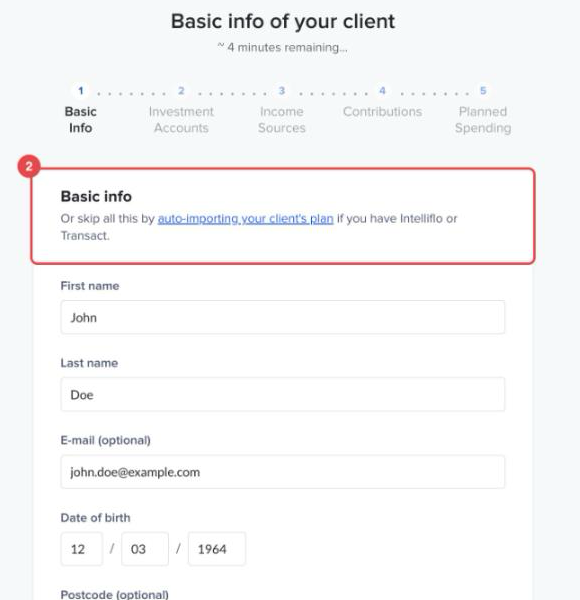
If your firm uses Intelliflo or Transact, the "auto-importing your client's plan" link at the top lets you import the plan instead of typing it in.
-
Click "Save & Continue".
3. Investment Accounts
-
Check each account Timeline has filled in from the FactFind. Click an account to open and edit it, or click "Add another account" to add one.
-
Click "Save & Continue".
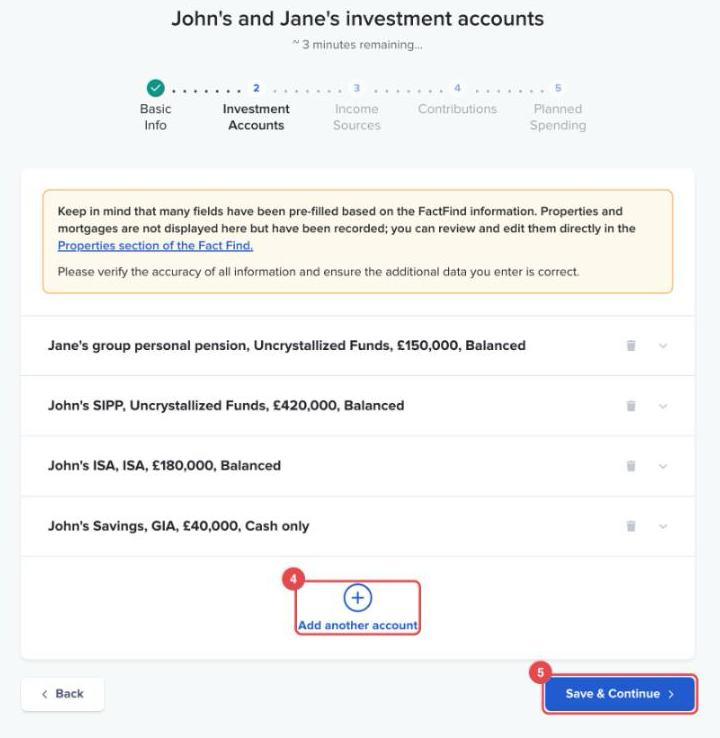
Properties and mortgages don't show in this step. Timeline takes them from the Properties section of the FactFind.
4. Income Sources
-
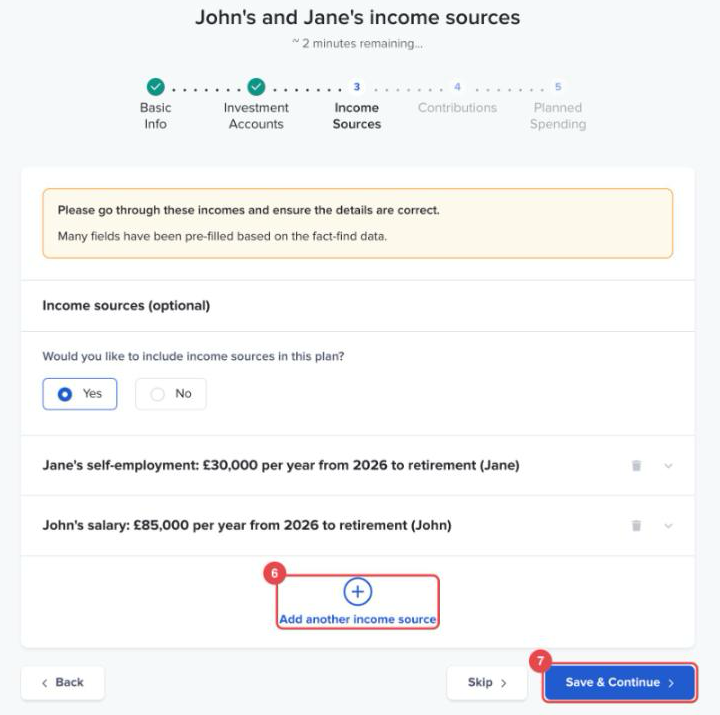
Under "Would you like to include income sources in this plan?", choose "Yes" or "No". Check the incomes listed, or click "Add another income source".
-
Click "Save & Continue", or "Skip" to leave income out for now.
5. Contributions
-
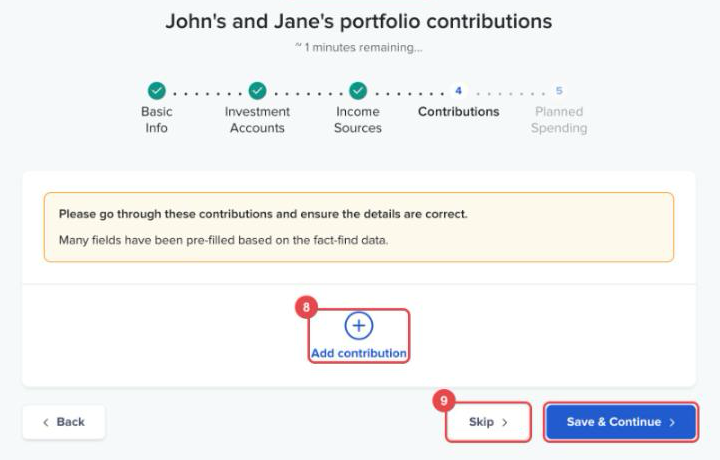
Click "Add contribution" for each regular payment into the client's accounts.
-
Click "Save & Continue", or "Skip" if the client isn't making contributions.
6. Planned Spending
-
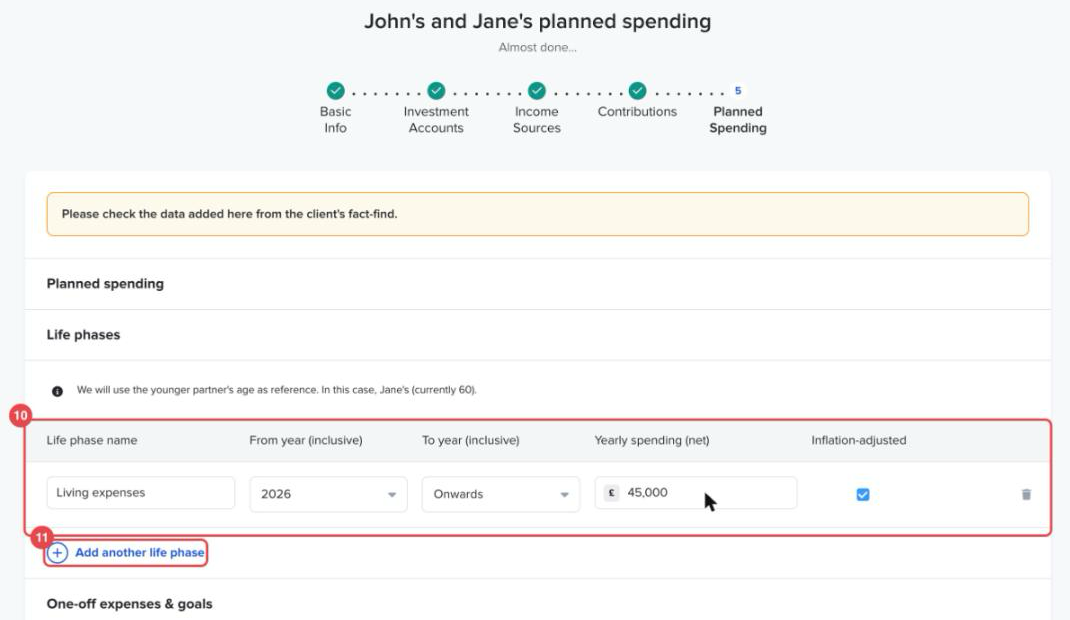
Under "Life phases", enter what the client plans to spend each year: a "Life phase name", the "From year (inclusive)" and "To year (inclusive)", and the "Yearly spending (net)". Tick "Inflation-adjusted" if the amount should rise with inflation. For a couple, the years follow the younger partner's age.
-
Click "Add another life phase" for each change in spending, for example a more active early retirement followed by a quieter later one.
-
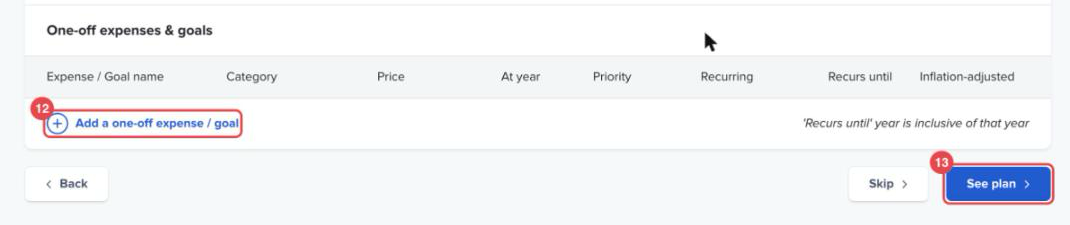
Under "One-off expenses & goals", click "Add a one-off expense / goal" for things like a new car, a wedding or a gift, with the price, the year and whether it recurs.
-
Click "See plan".
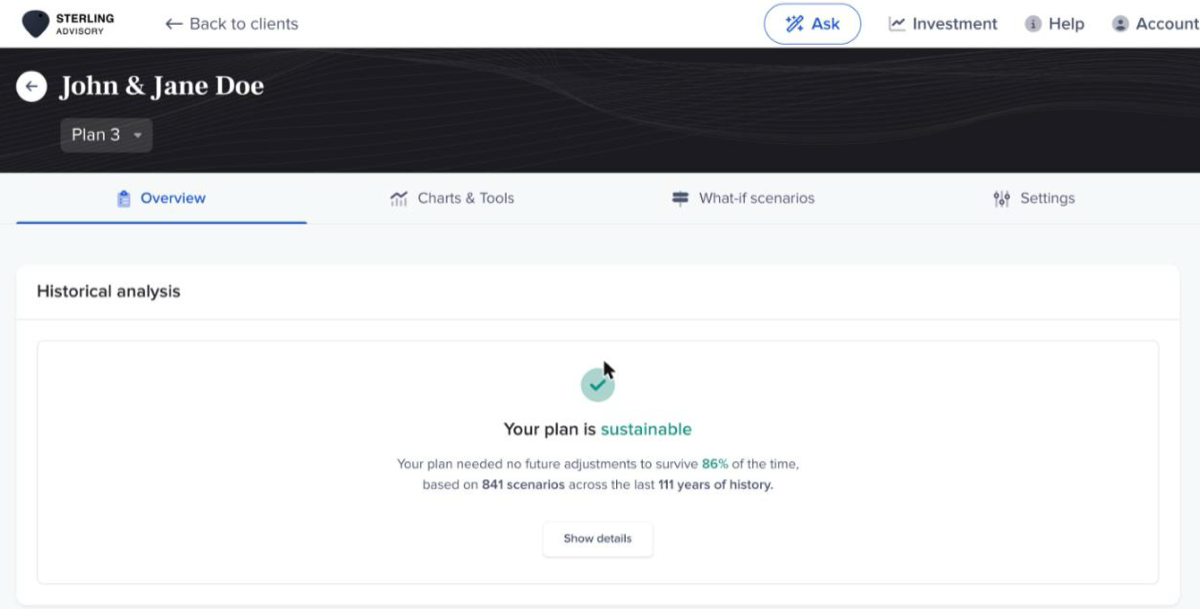
The plan opens on its "Overview" tab, with the historical analysis at the top.
Conclusion
The client now has a working financial plan built from what you already know about them. From here you can change any assumption, test alternatives and compare plans. Next, read Using What-if scenarios in the financial plan.