
The Push to backoffice feature relies on an API connection with the backoffice provider. We currently only offer this for Intelliflo, but we are considering an expansion to other providers; you can register interest for further integrations by contacting support@timeline.co
This feature lets you either create new clients or update the information of existing clients in the backoffice system using the data you store in Timeline. We exchange the following details:
- Names (first, middle, and last)
- DoB
- Gender
- Nationality
- Marital status
- National insurance number
- Phone number
- Address
Sign in to make the connection
The first step is to make the API connection. You can do this by visiting the Integrations tab on the Settings page:
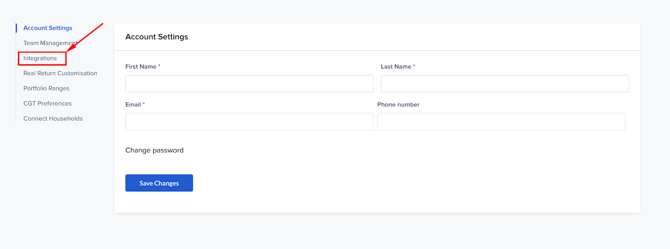
You must have a paid subscription or have clients invested in Timeline Portfolios in order to access this feature.
When you click ‘Intelliflo’, you will be redirected to their login page. After entering your correct credentials, you will be asked what data you want to grant us access to:

All boxes will start checked, but if you uncheck any then we won’t be able to import your clients’ data.
Once signed in, you will find the feature available from the Client details actions menu for all of your clients.
Visit the Client details page
Navigate to the Client details page by using the Client actions menu dropdown:
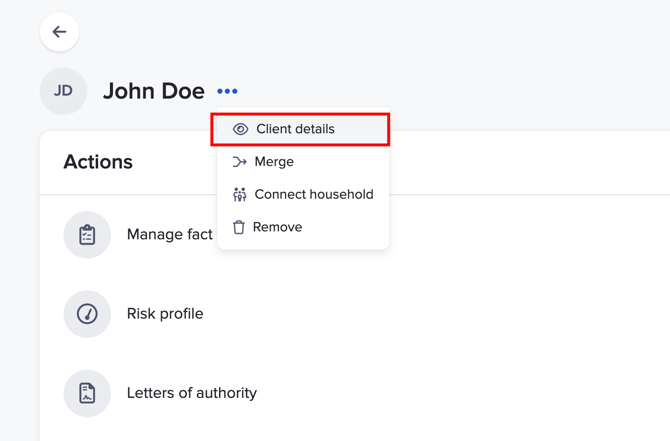
You can find the feature in the Client details actions menu dropdown:

It doesn’t matter which client you are viewing in the Client details page - all clients in the household will be pushed to Intelliflo when the feature is used.
What the button means
Each client has an “Intelliflo linked” status, which controls what you see:
- If not linked (False)
- You’ll see “Create in Intelliflo”
- → This creates a new client in Intelliflo and links it to Timeline.
- If already linked (True)
- You’ll see “Push details to Intelliflo”
- → This updates the existing client in Intelliflo.
A client is marked as linked if you’ve either:
- imported them from Intelliflo, or
- used this feature before.
If the client already exists in Intelliflo
If you see “Create in Intelliflo” but the client already exists in Intelliflo, you’ll need to link them first.
To do this:
- Go to Import multiple clients via connection
- Find the client
- Match them to the correct Timeline client
This process is safe - it will only fill in missing information and won’t overwrite existing Timeline data.
Adviser selection on client creation
When you log in to Intelliflo, we check whether you are registered as an adviser or a non-adviser in Intelliflo.
- If you are a non-adviser creating a client in Intelliflo, we will present you with a list of advisers in Intelliflo, and you must select one to assign the new client to.
- If you are an adviser creating a client in Intelliflo, then we will always assign the created client to your own Intelliflo adviser.
If you are updating a client that already exists in Intelliflo, then we will update the client without changing the adviser assignment.
Visit the client in Intelliflo
After you’ve pushed to Intelliflo, it should only take a few seconds for the update to finish. You’ll get a notification saying when it’s done, but you might have to refresh to see it.
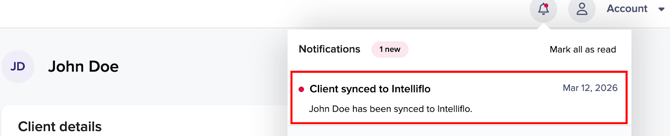
Clicking the notification will take you to the right client in Intelliflo.