
Summary
-
What it's for: Every client has a "Documents" page that keeps the documents Timeline produces for them in one place, so you don't have to save copies elsewhere.
-
What you'll do: Find a client's document, download it, and share it with the client by email or through the Client Portal.
-
Before you start: Documents appear here automatically. For example, a report you create with "Create report" is saved to the client's documents.
Description
1. Open the client's documents
-
Open the client in Timeline. Under "Actions", click "View documents".
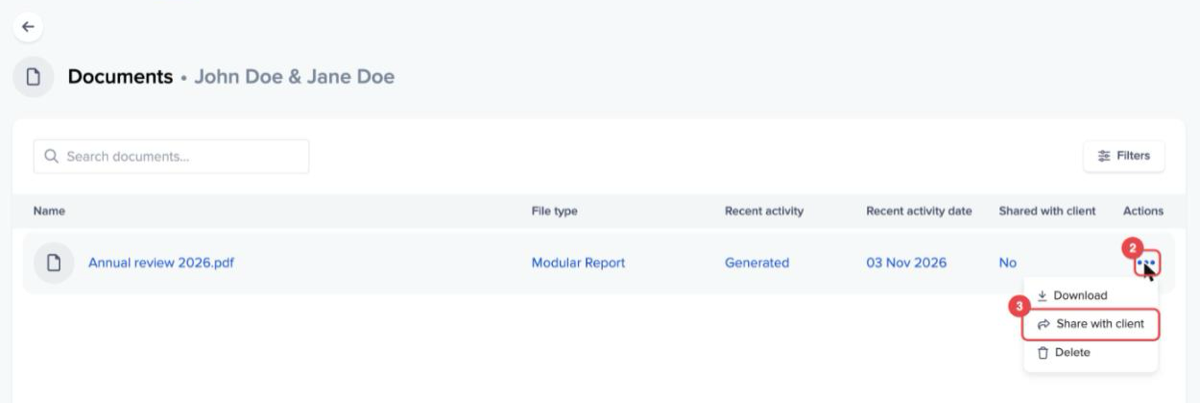
The "Documents" page lists each document with its "Name", "File type", "Recent activity", "Recent activity date" and whether it's been "Shared with client". Type in "Search documents..." to find one by name, or click "Filters" at the top right to narrow the list, for example by file type or date.
2. Share a document with the client
-
In the document's row, click the three dots under "Actions".
-
Click "Share with client".
-
A window opens asking "How would you like to share this document with the client?". Click "Send via email".
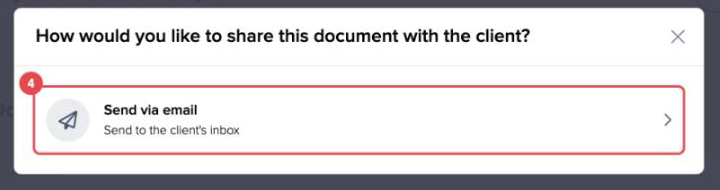
If someone in the household has access to the Client Portal, you'll also see "Add to Client Portal", which puts the document in the client's portal for them to open securely.
-
Check the recipient's "Email" (click "Add another email" to send it to a second person), write a "Subject" and, if you like, a message, then click "Send document".
Timeline confirms with "Document sent via email." or, for the Client Portal, "Document sent to Client Portal."
3. Download or delete a document
-
To keep a copy, click the three dots in the document's row and choose "Download".
-
To remove a document from the list, choose "Delete" and confirm with "Yes".
Conclusion
Your client's reports and documents now live in one place, ready to download or share when you need them. To create a report that lands here automatically, read Create and send a client report: a step-by-step guide.