
Summary
-
What you'll do: Create a report for a client from a template, check it, then download it or send it.
-
How long it takes: A few minutes once you have a template you like.
-
Before you start: The sections in your template need the matching data on the client's record. For example, FactFind sections need a completed FactFind, plan sections need a financial plan, and investment sections need at least one investment account.
Description
1. Open Create report
-
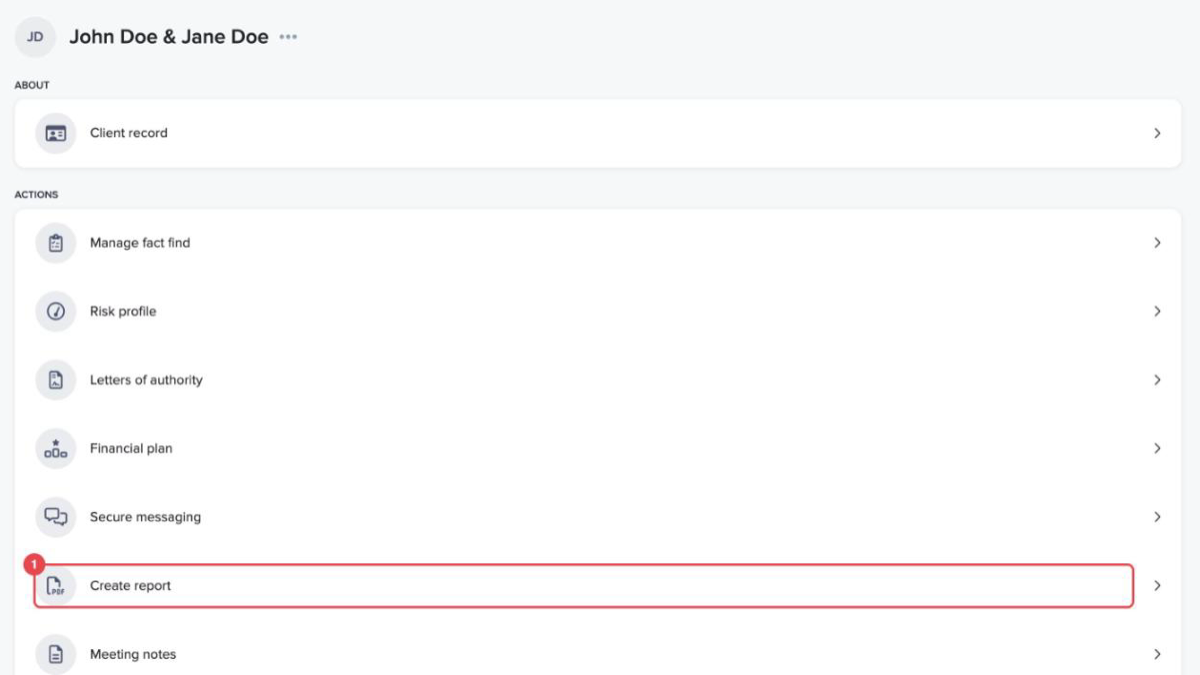
Open the client in Timeline. Under Actions, click "Create report".
2. Choose a template
-
The "Select template" page lists every template available to you. Timeline's four default templates are marked "Default", and any your firm has built are listed with the name of the person who created them. Click the template you want.
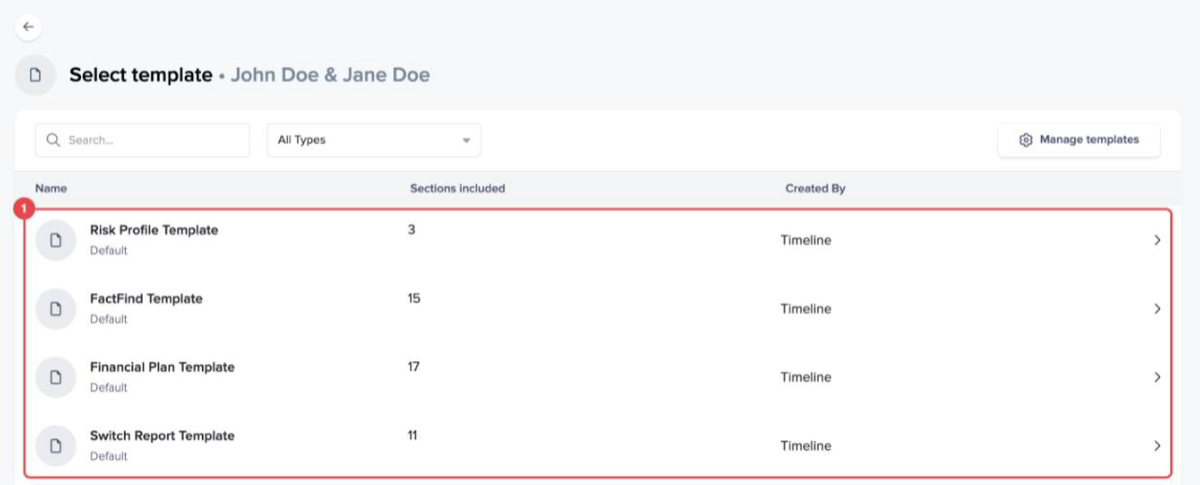
To build or change a template, click "Manage templates" at the top right. See Build reusable report templates in the Template Centre.
3. Personalise the report
Timeline now asks a few questions so it knows what to put in the report. You only see the steps your template needs, so the number of steps changes from one template to another. A counter at the top shows where you are, for example "Step 4/6".
-
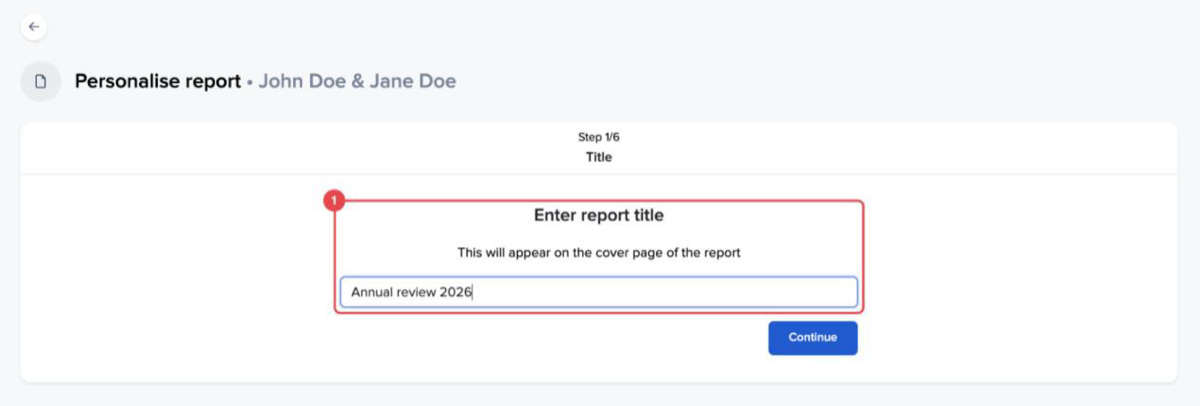
Title: Type the report's title in "Enter report title". It appears on the cover page and becomes the PDF's file name.
-
FactFind: If your template uses FactFind sections, choose which FactFind to take the data from.
-
Risk profile: If it uses risk profile sections, choose the questionnaire, and switch on "Capacity for Loss" if you want it included.
-
Investment Account Analysis: Under "Select accounts", tick the accounts to include. Answer "Would you like to compare portfolios?" if you want to show the client an alternative portfolio.
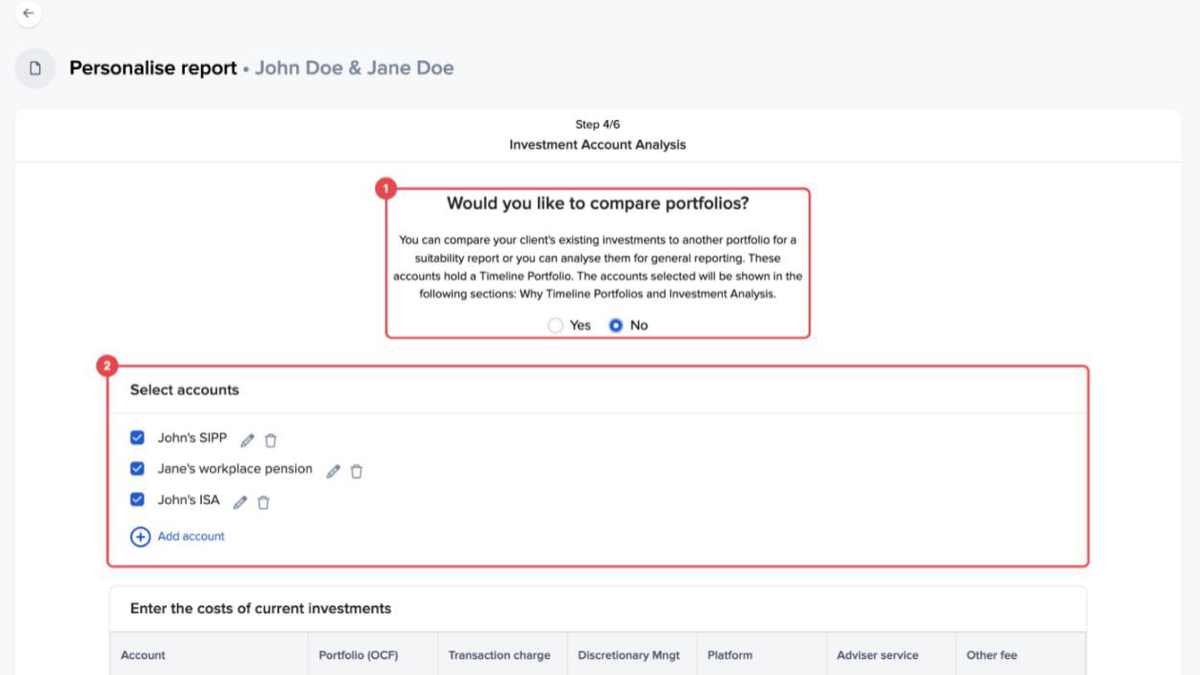
If you choose to compare, Timeline asks for the costs of each portfolio. Show the value of a switch: compare portfolios and plans in a report explains this step in detail.
-
Plans: Choose the plan in "Financial plan to export" and the market scenario in "Historical scenario to use". If the client has more than one plan, you can also pick plans to compare under "Select plans to compare".
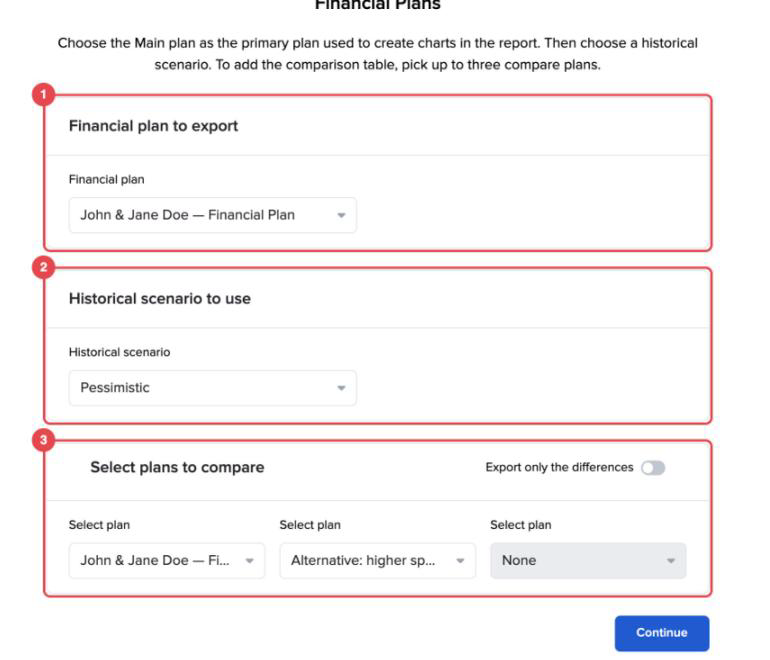
Some templates include further steps, such as Client Education, the signature page or client comments. Fill them in the same way.
4. Check the report
-
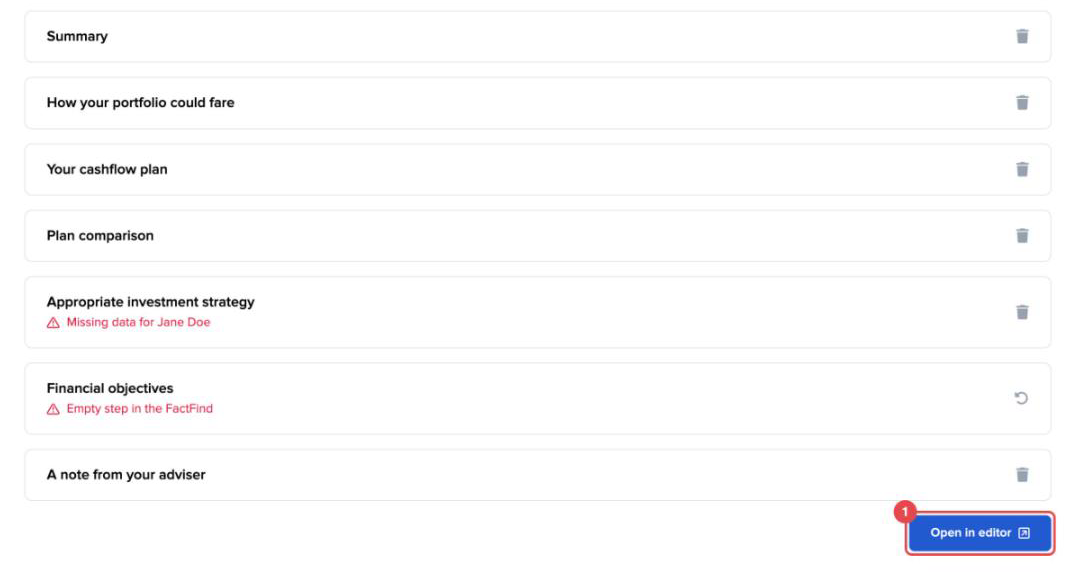
The last step lists every section in the report. If the client is missing data for any of them, the page is headed "Some sections have missing data" and shows which ones. Remove a section with its bin icon, or go back to the client's record and add the data. When you're ready, click "Open in editor".
-
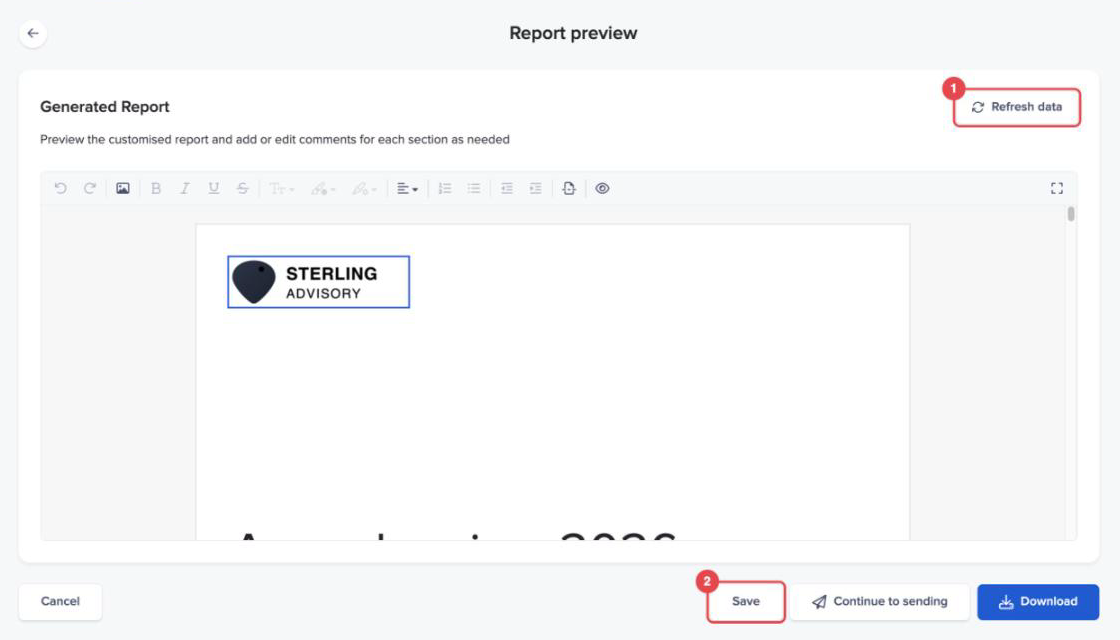
The "Report preview" opens. Read it through and change any of your own text. If you update the client's data in Timeline while the report is open, click "Refresh data" to update the charts and tables. Your own text stays as it is. Click "Save" to keep your changes.
5. Download or send it
-
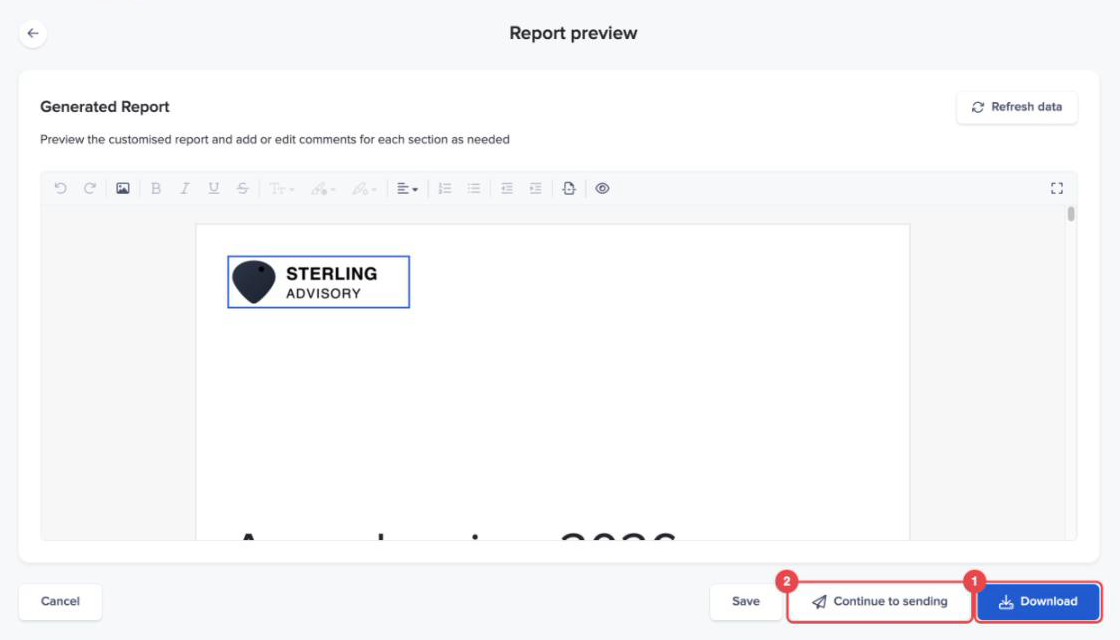
Click "Download" to get the report as a PDF, or "Continue to sending" to email it to the client.
-
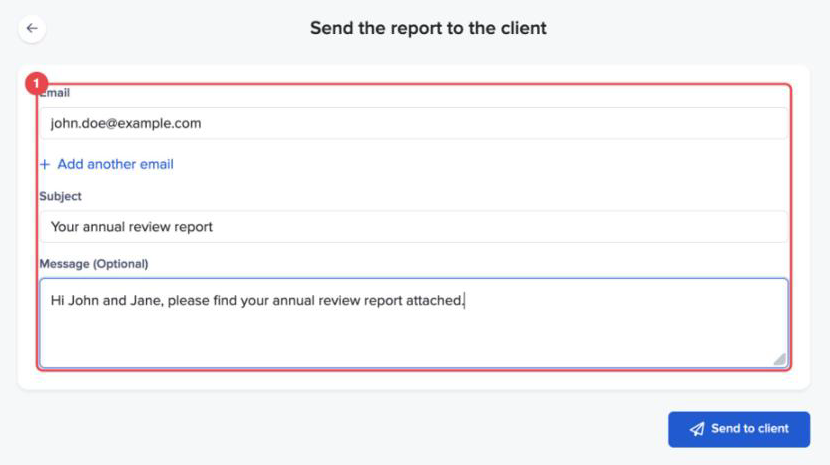
If you chose to send it, the "Send the report to the client" page opens. Check the "Email" address (use "Add another email" for a second person), write a "Subject" and, if you like, a "Message", then click "Send to client".
The report is saved in the client's Documents, so you can find it again later.
Conclusion
That's your first report done. Once you've built a template for each type of meeting, a report takes a few minutes: pick the template, answer the questions, read it through and send it.